




How to Calibrate a pH Meter Step by Step: Buffers and Common Errors
10/27/2026 00:04:34
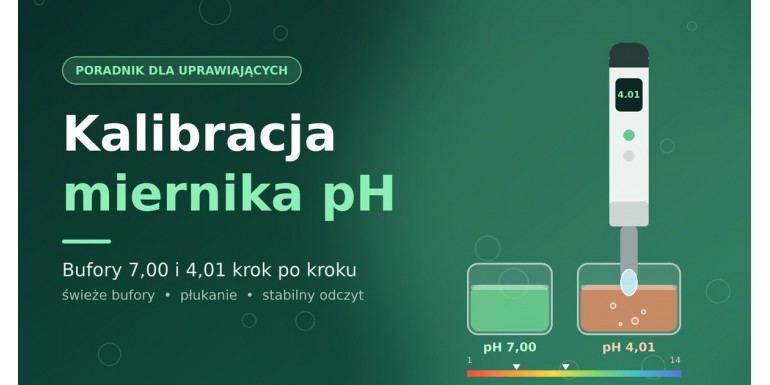
A pH meter is one of the essential tools for checking nutrient solution and water used in plant cultivation. Even a good-quality model will not provide reliable results if its electrode has not been calibrated correctly. Calibration compares the meter reading with solutions of a known pH value, known as buffers. It is a simple task that usually takes only a few minutes, yet it helps prevent mistakes when preparing nutrient solution and subsequent problems with nutrient uptake.
Why Is pH Meter Calibration So Important?
The pH of nutrient solution affects the availability of elements to plants. If the measurement is inaccurate, you may unknowingly adjust pH in the wrong direction. As a result, plants may show deficiency symptoms despite receiving complete nutrition. Yellowing leaves are not always caused by pH alone, but it is worth considering this factor when diagnosing the issue – see also Why Do Plant Leaves Turn Yellow? The Most Common Causes.
A pH electrode changes its properties over time. Factors include nutrient deposits, a dried-out measuring tip, intensive use, temperature, and the natural ageing of the measuring element. Calibration will not repair a worn electrode, but it can correct its current deviation and help you check whether the device still responds properly.
What You Need for Calibration
Before you begin, prepare a clean workspace and all the necessary items. Do not rush the calibration process or use liquids from an uncertain source.
- a pH meter with the manufacturer’s instructions,
- fresh pH buffer solutions,
- clean, small containers for portions of buffer solution,
- demineralised or distilled water for briefly rinsing the electrode,
- a soft, lint-free tissue for gently blotting excess moisture,
- electrode storage solution, if recommended by the meter manufacturer.
The most commonly used calibration points are pH 7.00 and pH 4.01. In cultivation, where the solutions being measured are acidic, this set will usually cover the practical measurement range. Choose products intended specifically for pH calibration, such as pH 7.00 calibration fluid and pH 4.01 calibration fluid. Do not replace them with tap water, water with citric acid added, or homemade mixtures – their pH value is not a stable reference point.
How to Choose Buffers for a pH Meter
The key rule is simple: check your device manual. Some meters support one-, two-, or three-point calibration and may recognise only specific buffer values. Do not assume that every model works in the same way.
One-Point Calibration
This uses one buffer, most often pH 7.00. It may be enough for a quick check of the device or for meters with a limited calibration procedure. However, it does not verify readings over a wider pH range as effectively as two-point calibration.
Two-Point Calibration
This is the practical standard for growers measuring the pH of water and nutrient solutions. The first point is most often set in pH 7.00 buffer, followed by pH 4.01. Two points allow the meter to match readings more accurately to the acidic range commonly used when feeding plants.
Three-Point Calibration
This method is used when supported by a particular meter and when measurements cover a wider pH range. A third buffer may be required depending on the device manual and the nature of the liquids being tested. Do not choose it at random – the order and supported values should follow the manufacturer’s recommendations.
How to Calibrate a pH Meter Step by Step
The procedure below is universal in nature. The button, mode name, and order of on-screen prompts may vary by model, so the instructions for your meter always take priority.
- Check the condition of the electrode. The measuring tip should be clean and moist. If it has been stored incorrectly or has visible deposits, clean it first according to the manufacturer’s recommendations.
- Prepare small portions of buffers. Pour the required amount of pH 7.00 and pH 4.01 solution into separate, clean containers. Do not immerse the electrode directly in the original bottle – contamination can reduce the quality of the entire solution.
- Switch on the meter and enter calibration mode. On some devices, holding the CAL button is enough; others guide the user automatically. The exact process depends on the meter design.
- Rinse the electrode. Briefly rinse it with demineralised or distilled water, then gently blot away excess liquid. Do not rub the glass section vigorously, as it is mechanically sensitive.
- Immerse the electrode in the first buffer. Usually, calibration begins with pH 7.00. The measuring section must be immersed according to the manufacturer’s marking, while the cable and housing – unless designed for immersion – should not enter the liquid.
- Wait for the reading to stabilise. Gently move the container or electrode to release air bubbles, but do not stir forcefully. Confirm the point when the meter shows a stable result or completes the procedure automatically.
- Rinse the electrode and repeat in the second buffer. For two-point calibration, move from pH 7.00 to pH 4.01 unless the manual for your model specifies a different sequence.
- Verify the result. Once calibration is complete, you can immerse the electrode in a fresh portion of buffer again and check whether the reading is stable and matches the solution value within the tolerances specified for the device.
- Discard used portions of buffer. Do not pour them back into the original container. Close the bottles and store them according to the label instructions.
If you are only just choosing a device, it is useful to understand the differences between simple testers and meters with additional features. Read our guide: How to Choose and Use a pH Meter. An example device for monitoring pH is the Milwaukee pH-51 pH meter, while those looking for a model with an automatic procedure can consider the PH-02 pH meter with auto calibration. Before buying, check the product description for supported buffers and operating guidelines.
How Often Should You Calibrate a pH Meter?
Calibration frequency depends on how intensively the meter is used, the accuracy required for a particular grow, and the condition of the electrode. There is no single rule suitable for every device, but several safe practices can be followed.
- For daily measurements: calibrate regularly, often before starting a series of measurements or as recommended by the manufacturer.
- For measurements taken several times a week: calibrate at least once a week and whenever a result seems questionable.
- For occasional use: calibrate before an important measurement, especially after longer storage.
- After cleaning, drying out, or heavy contamination of the electrode: calibrate before using it again.
- After major temperature changes: allow the meter and buffers time to reach a stable temperature, then check calibration if necessary.
In practice, it is useful to keep a simple record: calibration date, buffers used, and any unusual meter behaviour. This makes it easier to notice when the electrode is responding more slowly or can no longer be calibrated correctly.
Common pH Calibration Mistakes
Using Contaminated or Expired Buffer
This is one of the most common reasons for unsuccessful calibration. Buffer poured into a container after contact with the electrode should not be returned to the bottle. Also check the expiry date and storage conditions stated by the manufacturer.
Skipping Rinsing Between Buffers
Residue from the first solution carried into the second changes its value. Even slight contamination can make it difficult to obtain a stable calibration point. Briefly rinse the electrode between stages.
Storing the Electrode in Distilled Water
Distilled water is useful for quick rinsing, but it is usually not the right liquid for long-term pH electrode storage. Use the solution specified in the meter manual. Improper storage can shorten sensor life and reduce the stability of readings.
Calibrating in Nutrient Solution Instead of Buffer
Nutrient solution is not a calibration standard. Its composition and pH can change, so it is not suitable for setting a meter. First calibrate the device using appropriate buffers, then measure the prepared solution.
Rushing and Taking a Reading Before Stabilisation
An electrode needs time to respond. If you confirm a point too quickly, calibration may be inaccurate. Stabilisation time depends on temperature, electrode cleanliness, meter model, and the condition of the sensor itself.
Confusing pH Fluids with EC Fluids
pH buffers are used to calibrate pH meters, while EC fluids are intended for calibrating conductivity meters. These are two different measurements and two different types of reference solutions. If you also monitor nutrient solution conductivity, use the appropriate EC calibration fluids.
How to Care for a Meter After Calibration
Measurement accuracy depends not only on the buffers themselves but also on everyday electrode care. After use, rinse the tip according to the manufacturer’s recommendations, gently blot away water, and protect the sensor in the manner specified for the model. Do not leave the electrode in direct sunlight, near a heat source, or with the cap off if it requires a moist environment.
Inspect the electrode regularly. Slow response, fluctuating values, difficulty confirming a buffer, or an inability to calibrate may indicate contamination, incorrect storage, or wear of the measuring element. First, check that the buffers are fresh and clean the electrode according to the manual. If the problem persists, contact service support or consider replacing the device.
pH and Preparing Plant Nutrient Solution
First prepare the water and add fertilisers according to their labels, then measure and adjust the pH of the finished solution. Adding nutrients can alter pH, so measuring water alone before feeding does not replace checking the final nutrient solution. For indoor cultivation, you may consider the Milwaukee MW802 pH + EC meter, which allows you to monitor two important solution parameters.
When it comes to feeding, a consistent routine matters: a properly calibrated meter, fresh buffers, a clean electrode, and fertiliser used in line with the manufacturer’s recommendations. For basic care of plants grown indoors, choose a suitable pH meter, and among cultivation fertilisers, consider BIOBIZZ Trypack Indoor according to the manufacturer’s description and dosing instructions.
FAQ: pH Meter Calibration
Do You Need to Calibrate a pH Meter Before Every Measurement?
Not always, but with intensive use and wherever you need the most repeatable result possible, regular calibration before a series of measurements is good practice. For less frequent use, calibrate before an important measurement and whenever readings appear suspicious.
Can You Use Only pH 7.00 Buffer?
You can if your meter permits it, but two-point calibration with pH 7.00 and pH 4.01 usually checks readings more effectively in the acidic range. Always follow the instructions for your specific device.
Why Won’t the Meter Confirm the Buffer?
The cause may be old or contaminated buffer, a dirty or dried-out electrode, the wrong calibration mode, an unsupported buffer value, or sensor wear. Start with fresh fluids and check the manual.
Can Calibration Buffer Be Reused?
A portion poured into a container and used during calibration should not be returned to the bottle. The safest approach is to dispose of it according to the packaging information and use a fresh portion for the next calibration.
Does Temperature Affect pH Calibration?
Yes. Temperature can affect the behaviour of both the electrode and the buffers. Some meters have a temperature compensation function, but this does not replace proper procedure. Avoid calibrating with liquids at extremely different temperatures and allow the device to stabilise before taking a reading.
Summary
pH meter calibration is based on simple principles: use fresh buffers suitable for the device, prepare separate portions of fluid, rinse the electrode between points, and do not rush the stabilisation of the reading. The commonly used two-point calibration with pH 7.00 and pH 4.01 buffers provides a solid basis for monitoring water and nutrient solution. Regular meter checks and proper electrode care help maintain reliable results in everyday cultivation.